

How do you pass a soccer ball more accurately?
Take a first touch that opens up the passing angle, plant your support foot beside the ball pointing at the target, and strike through the middle of the ball with the inside of the foot and a locked ankle. Weight it so your teammate can use it, and practice wall and gate drills with both feet before adding movement and pressure.
Why passes go astray
A good pass is more than reaching a teammate. It has to arrive on the right side, at the right pace, and at a height they can control. Direction, weight and the receiver's first touch work together.
In a game, that difference matters. Accurate, well-weighted passes keep possession, let teammates play forward on their first touch, and take defenders out of the play. Every pass also starts with how the previous ball was received.
Better ball contact changes everything, including the simplest pass. If your contact is still inconsistent, start with the clean-contact guide. These drills need a ball, a wall or partner and two cones. To see how each pass actually traveled, record your sets with the free KickMap AI smartphone app; the optional KickMap Trainer shows where to meet the ball.
Read your passing misses
Look across several similar passes, change one cue, then repeat the set.
- Often wide of the target?
- Check where the inside of the foot faces at contact and whether the swing travels toward the target. A support foot pointing at the target helps.
- Bouncing or lifting?
- Check whether contact is below the middle of the ball, whether the ankle is loose, and whether the ball or surface is uneven. Try a stationary ball on a flat surface first.
- Too hard or too soft?
- Weight is about the receiver. Ask what they need: to play first time, to take a touch, or to run onto it. Practice the same distance at different paces.
- Fine in drills, lost in games?
- Pressure shortens your time. Check scanning before the ball arrives and the quality of your first touch, then add light, non-contact pressure in practice.
Inside-foot contact, explained
Separate the surface of your foot (inside, laces, outside) from the contact point on the ball. The inside of the foot offers a large, flat surface, which makes it the most forgiving choice for accuracy over short and medium distances.
- Ankle. A firm ankle helps the foot behave like one solid surface. A loose ankle can absorb energy unevenly and let the foot angle change at impact.
- Swing path. The direction the foot is travelling, together with the angle the foot faces, sets the ball's starting direction. Swinging across the ball tends to send it off line.
- Contact height. Contact near the ball's middle tends to keep a short pass on the ground. Contact lower on the ball adds an upward component that can lift or bounce it.
- Pace. Swing speed and how firmly the foot meets the ball set the pace. More swing doesn't mean more accuracy.
- Spin. Hitting off center or brushing across the ball adds spin. Centered contact with the swing on line gives a cleaner roll.
- Inside foot vs laces. The inside of the foot is the most reliable choice for short, accurate ground passes. The laces (instep) suit longer driven or lofted passes, with a smaller margin for error.
- Ground vs lofted. Ground passes are usually quicker and easier to control. A lofted pass needs contact lower on the ball and a more upward swing to clear defenders, and is harder to weight accurately.
- Lime: the flat inside of the foot, ankle locked with toes slightly up.
- Red: an example contact near the middle of the ball, which tends to keep a short pass low.
- Cyan: the ball rolling low toward the target.
Repeatable passing technique
- 1Plant foot. Place the support foot beside the ball, a comfortable distance away, generally pointing toward the target. Find the spacing that lets you swing freely.
- 2Open the hip. Turn the passing foot out so the flat inside faces the target. Open from the hip and knee together, not just the ankle.
- 3Lock the ankle. Toes slightly up, heel slightly down, ankle firm.
- 4Body over the ball. Stay balanced with a slight knee bend and your head steady. Leaning far back can contribute to passes that lift.
- 5Follow through. Let the foot carry on toward the target after contact and land balanced.
First touch and pass weight
A pass your teammate can't control isn't a good pass, however straight it was. Weight it for what comes next: firmer when they want to play first time, softer when they need a touch, ahead of them when they are running.
Your first touch creates the passing angle. A touch that sets the ball slightly out of your feet, away from pressure and toward your next target, gives you room to plant and pass cleanly.
Receiving is the other half. Scan before the ball arrives, open your body so you can see the next option, and cushion the ball by giving slightly on contact. A first touch that moves the ball a step into space sets up the next pass.
Open the body before the ball arrives, give slightly on contact, and guide the ball a step or two into space.
Common errors and fixes
- Toe-poking the pass
- Turn the foot out from the hip so the flat inside faces the target, and slow down until the shape feels natural.
- Floppy ankle
- Lock the ankle, toes slightly up, before the foot reaches the ball. Practice short, firm passes against a wall.
- Swinging across the ball
- Swing through toward the target and let the follow-through travel along the same line.
- Leaning back
- Stay over the ball with the support knee slightly bent; leaning back can contribute to passes that lift.
- Ball stuck under your feet
- Take the first touch a step out of your feet so there is room to plant and pass.
- Only using one foot
- Give the weaker foot its own scored sets at a shorter distance rather than avoiding it.
Five passing drills
Before you start: use a wall that's safe to kick against, away from windows, roads and people. Keep pressure drills non-contact and stop if anything hurts. Shorten the distances for younger players.
Gate 1–2 yards wide · 5–10 yards away · 10 passes per foot
Green: passer. Red: gate cones. Grey bar: partner or a solid rebound wall.
Drill 1:Wall passing accuracy
2 × 10 passes per foot- Setup & repetitions
- Mark a target about 1 yard wide on a solid wall that is safe to kick against (tape or chalk). Start 4–6 yards away for younger players, 6–10 yards for older players. Pass, collect the rebound, reset.
- What to measure
- Count passes that hit the target out of 10, per foot. Step back once you hit 6–7 of 10.
- Coach cue
- Ankle locked, toes up, strike through the middle of the ball toward the target.
- Adapt & progress
- Easier: wider target, closer. Harder: smaller target or one step back, changing one at a time.
Drill 2:Gate passing
10 passes per foot- Setup & repetitions
- Set two flat markers or soft cones 1–2 yards apart, 5–10 yards from you (closer for younger players). Pass a stationary ball through the gate to a partner or wall.
- What to measure
- Count clean passes through the gate out of 10, per foot, and note whether misses go left, right or bobble.
- Coach cue
- Point the support foot at the gate and follow through along the same line.
- Adapt & progress
- Easier: wider gate, shorter distance. Harder: narrower gate, or pass through a second gate at an angle.
Drill 3:First touch + pass
2 × 60 seconds- Setup & repetitions
- A partner or wall plays the ball to you from 5–8 yards. Take one touch out of your feet to the side of a cone, then pass through a gate or back to the partner.
- What to measure
- Count sequences where the touch sets up the pass without an extra correction touch. Log each foot.
- Coach cue
- Open your body before the ball arrives; soft ankle to receive, firm ankle to pass.
- Adapt & progress
- Easier: two touches allowed. Harder: receive with one foot and pass with the other, or touch away from a called side.
Drill 4:Moving target / partner
8–10 passes- Setup & repetitions
- A partner jogs slowly across a 8–12 yard channel. Pass ahead of them so they can collect it in stride. Without a partner, pass to a cone placed a few yards ahead of the one you looked at.
- What to measure
- Count passes the receiver controls in stride without stopping or reaching back. The receiver calls the result.
- Coach cue
- Look up, pick the space in front of the receiver, then pass into it.
- Adapt & progress
- Easier: walking pace, wider channel. Harder: vary the receiver's speed and direction, and use both feet.
Drill 5:Pressure / decision passing
3 rounds of 60–90 seconds- Setup & repetitions
- In an 8–12 yard square, three players keep possession against one light, non-contact defender. Two small gates on opposite sides count as bonus targets. Rotate the defender each round.
- What to measure
- Count completed passes in a row and note whether misses came from pace, direction, the first touch or the decision.
- Coach cue
- Scan before the ball arrives. If a gate is open, play through it; if not, keep it simple.
- Adapt & progress
- Easier: bigger square, passive defender. Harder: smaller square or two-touch limit. Keep it non-contact for younger players.
Next step: passes in the air
Once your ground passes are reliable, some situations need the ball off the floor: over an outstretched leg, or into space behind a defender. Watch these two, then try them with the same gate-and-target counting.
Free KickMap AI app + optional Trainer
Start with the free app. KickMap AI records your passes and uses computer vision to analyze the ball's flight. All you need is a smartphone and a soccer ball.
Your gate counts stay the main passing score; the app shows how each ball traveled. The optional KickMap Trainer shows where to meet the ball for a clean, centered inside-foot strike.
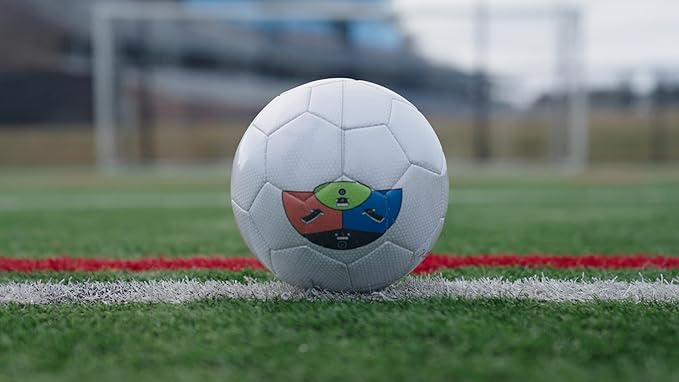
Optional KickMap Trainer
A color-coded strike map on the ball, so you can see where you meant to make contact.
Explore the Trainer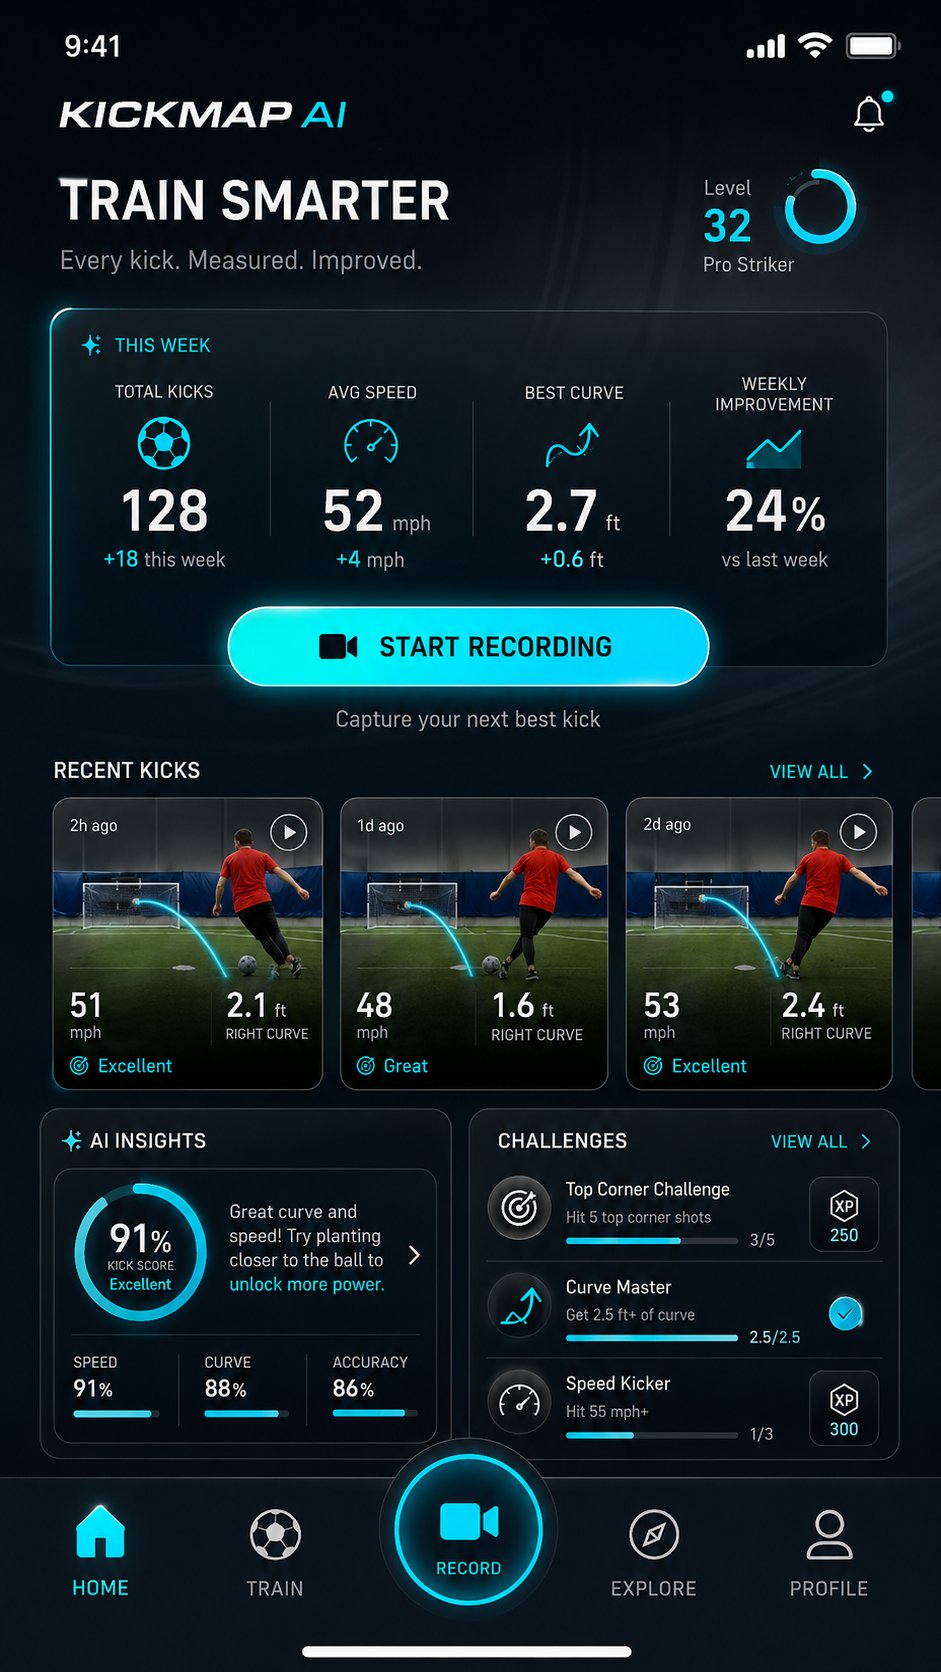
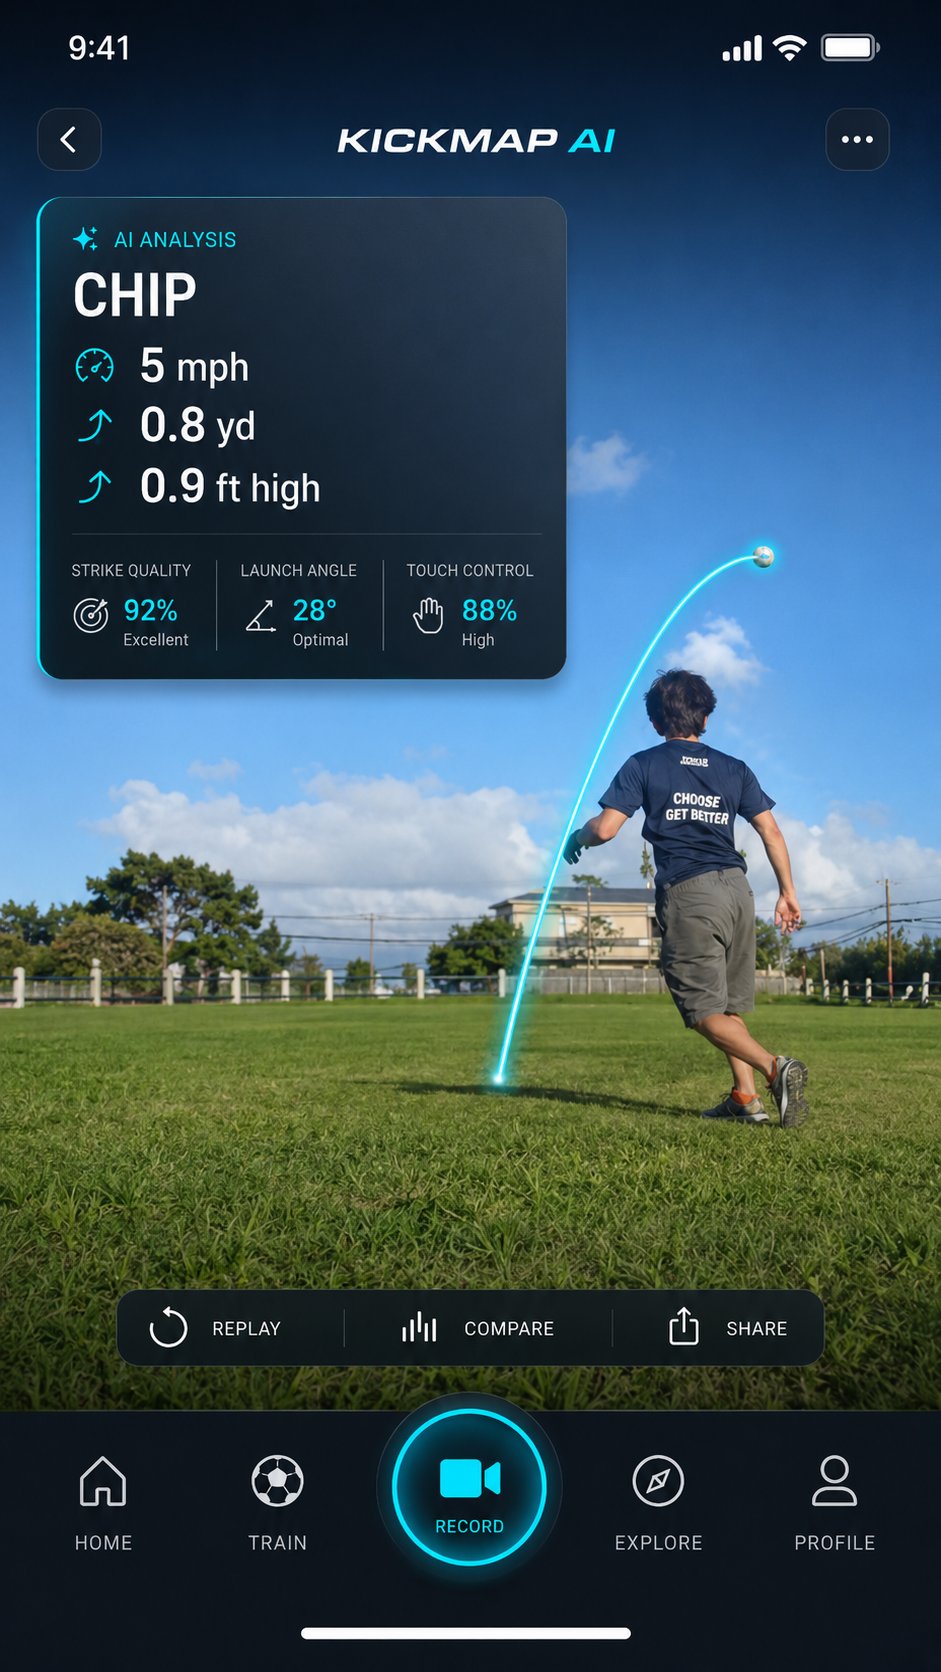
Free KickMap AI App
Record with your phone and an ordinary ball, and KickMap AI analyzes how each pass traveled so you can connect the pass you intended with what happened.
Measuring passing progress
Track three things separately, because they answer different questions:
- Completion. Did the pass reach the receiver or wall target? Useful, but a completed pass can still be poorly placed.
- Target accuracy. Did it go through the gate, or to the receiver's chosen foot or space? Count hits out of attempts.
- Weight. Could the receiver use it for their next action? A partner can rate each pass "too soft / right / too hard".
Keep conditions consistent so comparisons are fair: same ball, surface, distance, gate width and time limit.
Log the date, drill, distance, gate width, foot and results. A narrower gate or longer distance is a harder task, so compare like with like. Record your sets in KickMap AI, with the phone safely outside the passing lane, and you'll have the clips and the flight analysis together when you compare. The smartphone analysis guide shows the setup.
A 20-minute session
Keep a steady pace; retrieval and rest count.
- 0–3 minWarm up: easy movement and short, gentle passes with both feet.
- 3–7 minWall passing accuracy: 10 passes per foot at a target.
- 7–10 minGate passing: 10 passes per foot, full resets.
- 10–13 minFirst touch + pass: two 60-second sets with rest.
- 13–18 minMoving target or pressure rounds, depending on players available.
- 18–20 minCool down, log results and choose one cue for next session.
FAQs
What is the best way to improve passing accuracy in soccer?
Practice the inside-foot pass at a comfortable distance through a target such as a small gate, keep the ankle firm and strike through the middle of the ball. Track completion through the target, practice both feet, then add movement and light pressure gradually.
Why do my passes bounce or pop up?
Usually it's contact below the middle of the ball, a loose ankle, a bumpy surface or a ball that's still bouncing. Try a stationary ball on a flat surface and focus on contact near the middle with a locked ankle.
How do I control the weight of a pass?
Weight comes mainly from swing speed and how firmly the foot meets the ball. Practice the same distance at different paces and ask a partner whether the ball arrived too fast, too slow or just right for their next action.
Should I pass with the inside or outside of my foot?
The inside of the foot offers the largest flat surface and is usually the most reliable starting point for accuracy. The outside and laces are useful for disguise or longer passes; practice them separately once the inside-foot pass is consistent.
How can young players practice passing safely?
Use an age-appropriate ball, short distances and a wall or partner that is safe to kick toward. Keep drills non-contact, rest often, stay clear of windows and roads, and have a coach or responsible adult supervise.
Do I need the KickMap Trainer or the app to practice passing?
No. A ball, a wall or partner and two cones are enough. The free KickMap AI app records your passes and analyzes the ball's path, so you can compare sessions. The optional Trainer shows where to meet the ball.
Pick a gate, pass with both feet and choose one cue for next time. Small, honest sets build passes your teammates can trust.